When fixing broken oven hinges, you’ll first need to diagnose issues like door misalignment or unusual noises. Start by verifying hinge screws using a screwdriver, then inspect the hinges for wear or damage.
If replacement is necessary, make sure you’ve got the right hinge type and tools— typically a screwdriver and pliers. Carefully remove the old hinges and install the new set, making sure they’re precisely aligned.
Test the repair by opening and closing the door to confirm functionality. Regular maintenance, like cleaning and lubricating hinges, can prevent future failures. Keep exploring for more insights on sustaining your oven’s peak performance.
Understanding the Importance of Functional Hinges
Oven hinges are crucial for the safe and efficient operation of your appliance, often bearing the full weight of the oven door during opening and closing. When these components wear out or break, it directly impacts your oven’s functionality.
Regularly inspecting and lubricating the hinges can prevent unexpected failures and extend the life of your oven. If you notice stiffness or squeaking, it’s likely time to lubricate the hinges to guarantee smooth operation.
Consider adjusting the hinges if the door doesn’t close properly, as this could compromise the door seal gasket, leading to heat loss.
Should these steps not resolve the issues, looking into replacement parts becomes necessary to maintain peak performance and safety.
Diagnosing Broken Oven Hinges
To accurately diagnose broken oven hinges, you’ll first need to identify common symptoms such as a door that won’t close properly or makes unusual noises during operation.
Make sure you have the right tools on hand, including a screwdriver set and a flashlight, to inspect the hinges thoroughly.
This practical approach helps pinpoint the exact issue, setting the stage for effective repair.
Identifying Symptoms of Broken Hinges
If you notice your oven door isn’t closing flush against the frame, it’s a clear sign your hinges may be misaligned.
Listen for any scraping or popping sounds when opening or closing the door, as these unusual noises can indicate hinge issues.
Regular checks for these symptoms will help you catch hinge problems early, preventing further damage to your oven.
Misaligned Door
A misaligned door often indicates that your oven’s hinges may be damaged or broken. Start by consulting your repair guide or instruction manual.
Gather a screwdriver and new screws, and consider purchasing an oven door hinge kit if needed. Carefully follow the manual’s directions to replace the faulty oven hinges.
This method guarantees your repair is efficient and aligns with the community of DIY fixers like yourself.
Unusual Noises
Besides misalignment, another common indicator of faulty oven hinges is the presence of unusual noises when opening or closing the oven door. These sounds suggest reduced wear resistance, necessitating a check on your hinges’ maintenance frequency.
Applying a suitable lubricant can quiet these noises, enhancing repair simplicity. Regularly using a cleaning solvent helps maintain this peak performance, ensuring your oven’s longevity and top performance.
Tools Needed for Diagnosis and Repair
To diagnose broken oven hinges effectively, you’ll need a few specific tools: a screwdriver set, a flashlight, and a multimeter.
First, check the manufacturer’s website for specific guidance on your model. You might find useful DIY videos demonstrating how to locate and test the hinges.
With your manual screwdriver, carefully remove the screws securing the hinge. An electric screwdriver can speed up this process but make sure you’re using the correct bit to avoid stripping the screws.
Use the flashlight to inspect the hinge area for any obvious damage or wear.
Step-by-Step Guide to Fixing Broken Oven Hinges
Before you begin repairing your oven’s broken hinges, you’ll need to gather the right tools and make sure the oven is unplugged and cool.
Next, you’ll remove the faulty hinges by unscrewing them from the frame, taking care to note their orientation for easier installation of the new hinges.
Preparation Before You Begin
Make sure you gather all necessary tools and equipment, typically including a screwdriver, pliers, and a new hinge set, if required.
Before getting into the task, familiarize yourself with the specific type of oven hinges you’re dealing with. Whether they’re Blum soft-close hinges, Grass Tec soft-close hinges, Salice Silentia hinges, Amerock BP2811J2318, or Hettich Sensys hinges, understanding their unique mechanisms can greatly simplify your process.
Check the compatibility of your new hinges with your oven model. It’s also wise to have the manufacturer’s manual handy for any specific instructions or diagrams.
Preparing well not only eases the installation but also ensures you aren’t stuck midway without the right tools or parts.
Removing the Broken Hinges
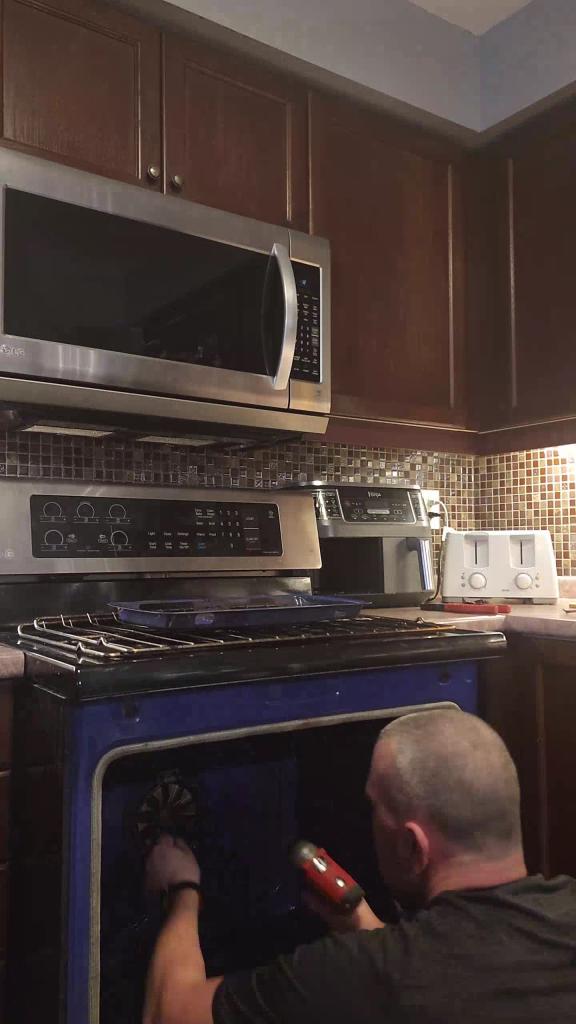
Let’s remove the broken hinges from your oven. First, make sure your oven is off and cool. Open the door to its fully extended position.
You’ll find screws securing the hinge in place—usually located at the base or side of the door. Using your screwdriver, carefully remove these screws. Keep them together in a small container; you’ll need them for the replacement hinges.
Next, gently detach the hinge from the oven’s frame. It might require a bit of wiggling—be patient and avoid using excessive force to prevent damage to the oven’s structure. Once free, set the broken hinge aside and prepare for the next step: installing the new hinges.
Installing New Hinges
With your new hinges ready, align them precisely at the door’s base or side where the original was mounted. Check that the pivot points match the oven’s frame to guarantee smooth operation.
Use the correct tool, typically a screwdriver or wrench, to attach the fasteners securely.
As you work, refer to the technical support documentation to confirm each step. Guarantee the springs are properly connected to the joints to maintain tension and support the door’s weight.
Testing the Repair
When replacing or repairing the hinges on an oven door, it’s crucial to ensure everything is correctly aligned and securely fastened to prevent future issues. Follow this simple five-step guide to check and finish the installation of your oven door hinges.
| Step | Task | Description |
|---|---|---|
| 1 | Test the Oven Door | Open and close the oven door gently to check the new hinges for proper function and alignment. This initial test will help you confirm that the door moves smoothly without resistance. |
| 2 | Secure the Hinges | Using a screwdriver and wrench, make sure all connections to the hinges are tight and secure. Properly tightened screws will prevent the door from wobbling or becoming misaligned later. |
| 3 | Reattach the Oven Rack Guides | Carefully slide the oven rack guides back into place, ensuring they align and mesh correctly with the new hinges. This will ensure that your oven racks slide in and out smoothly. |
| 4 | Check for Adhesive Spillage | Inspect the area around the hinges for any excess adhesive that might have seeped out during the installation. Clean up any residue immediately to prevent the mechanism from becoming sticky or obstructed. |
| 5 | Final Testing and Adjustments | Wearing protective gear, perform a final test by opening and closing the oven door several times. If the door feels unstable or misaligned, readjust the hinges as necessary. Tighten all connections one last time to ensure everything is securely fastened. |
Preventive Maintenance Tips for Oven Hinges
To guarantee your oven’s hinges function smoothly for years, you’ll need to maintain them regularly.
Start by cleaning and lubricating the hinges every six months to prevent grime build-up and reduce wear.
Perform routine inspections to catch any signs of wear or damage early, addressing issues before they lead to hinge failure.
Regular Cleaning and Lubrication
Regularly cleaning and lubricating your oven hinges helps prevent stiffness and wear, guaranteeing smooth operation.
Start by gently wiping the hinges with a clean cloth to remove any debris.
For thorough cleaning, apply a mild detergent solution, but make sure it doesn’t seep into the oven interior. Rinse carefully and dry completely.
Next, apply a high-quality lubricant specifically designed for high-temperature environments. This reduces friction and protects against rust.
When applying lubricant, use it sparingly and avoid any contact with oven heating elements.
Routine Inspections
You should inspect your oven hinges every few months to catch early signs of wear or damage. Start by examining the supports and axles for any signs of stress or distortion.
Check the bolts and nuts to make sure they’re tight and not corroded. If you find any parts that seem worn or damaged, it’s important to have spare parts on hand to replace them quickly.
Don’t overlook the importance of these inspections; they’re essential for maintaining the longevity and functionality of your oven. Regular checks help you feel connected to the well-being of your kitchen appliances, making sure you’re never caught off-guard by a malfunction.
This proactive approach not only saves you time but also helps avoid costly repairs down the line.
Common Misconceptions About Oven Hinge Repairs
You might believe that fixing oven hinges is a job best left to professionals, but with the right tools and guidance, DIY repairs can be both feasible and cost-effective.
Misjudging the complexity of hinge repairs can lead you to underestimate the potential savings of handling it yourself.
Always assess the damage carefully and consider if your skills match the repair needs to avoid unnecessary expenses.
DIY vs. Professional Repairs
Many homeowners believe they can easily fix their oven’s broken hinges themselves, but several factors must be considered before attempting DIY repairs.
You must understand the specific components of your oven model and procure the correct replacements. Using tools like pliers and a hammer requires skill, especially in tight spaces where precision is paramount.
Moreover, electrical safety is a significant concern; mishandling wiring can lead to hazards. Brand reputation could also be at stake; improper repairs might void warranties or lead to further damage, compromising the oven’s performance and safety standards.
It’s important to assess your ability realistically and consider whether you possess the necessary technical expertise or if professional help is warranted to guarantee a safe, efficient fix.
Cost Implications of Hinge Repairs
When it comes to oven hinge repairs, it’s important to dispel the misconception that these fixes are always costly, as several factors can influence the total expense.
The material quality and durability of the hinges play vital roles. Opting for high-grade materials can seem pricey initially, but they offer better longevity and ease of use, potentially saving you money in the long run.
Also, choosing hinges that are compatible with your oven’s brand can affect costs. Some brands might be pricier but offer warranties that justify the initial investment. Always check if the hinge model aligns with your oven’s specifications to avoid unnecessary expenses on incompatible parts.